Performing Basic Actions
The Basic Actions that most objects support are create, edit, delete, export, and refresh.
Create and edit windows are pop-up windows that can be used to create or change an object's details. A simple Edit window (for the Queue object) is shown below.
The following figure shows the first tab of the queue editor.
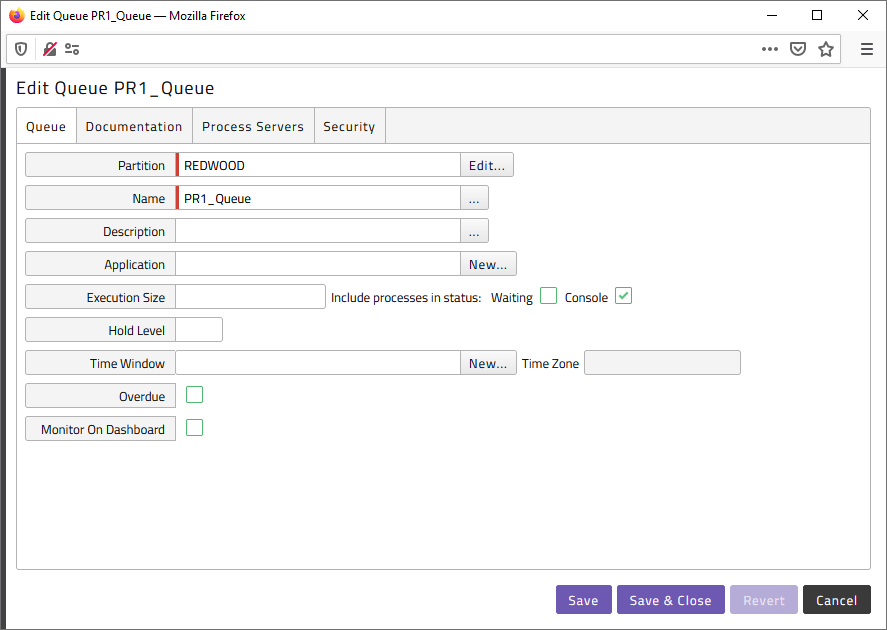
The queue editor has several tabs on it, the Queue tab can be used to edit the main object's own details. The Process Servers tab is used to add or remove the process servers fed by the queue.
Fields with a darker background are mandatory. Fields with a white background are optional. Certain fields have an auto-complete functionality. When these fields are chosen a small light bulb is shown next to the field on the left-hand side. As soon as one or more letters have been entered into such a field, a drop-down provides possible choices and automatically filter these to match the letter sequence entered. The letter sequence does not have to start with the first letter of the object's name, for example, in a time window field, Ind as well as dence both match the time window System_US_IndependenceDay. You can use the wildcards % (any numbers of characters) as well as _ (single character) and can use the escape character \ to escape these wildcards.
Some fields also have a New <object_type> link next to them. This link can be used to create a new object of the appropriate type in a separate window while the first object is edited.
To create a new relationship, choose Add. This populates the lower window with fields for the object's relationships.
The following figure shows the second tab of the queue editor, with several relationships.
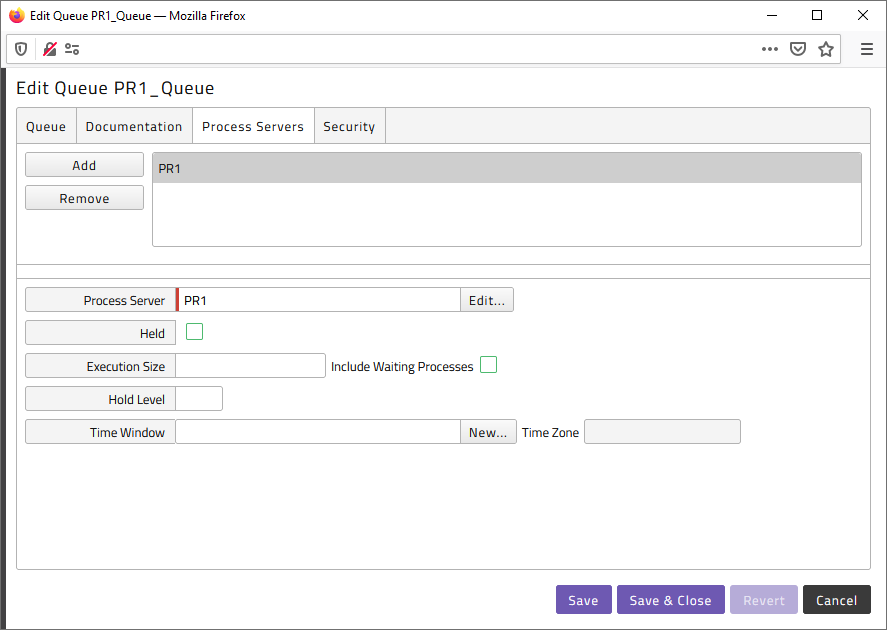
To navigate between different relationships, use the white box located above.
Security
note
Custom roles are created in your authentication system and are created in Redwood Server as soon as a user with the role successfully logs on.
The Security tab allows you to grant specific users or roles object-level access to the object you are editing. This allows fine-grained security. You can also grant privileges of object types to your custom roles on the following levels:
- System - applies to all partitions.
- Partition – applies to a single partition.
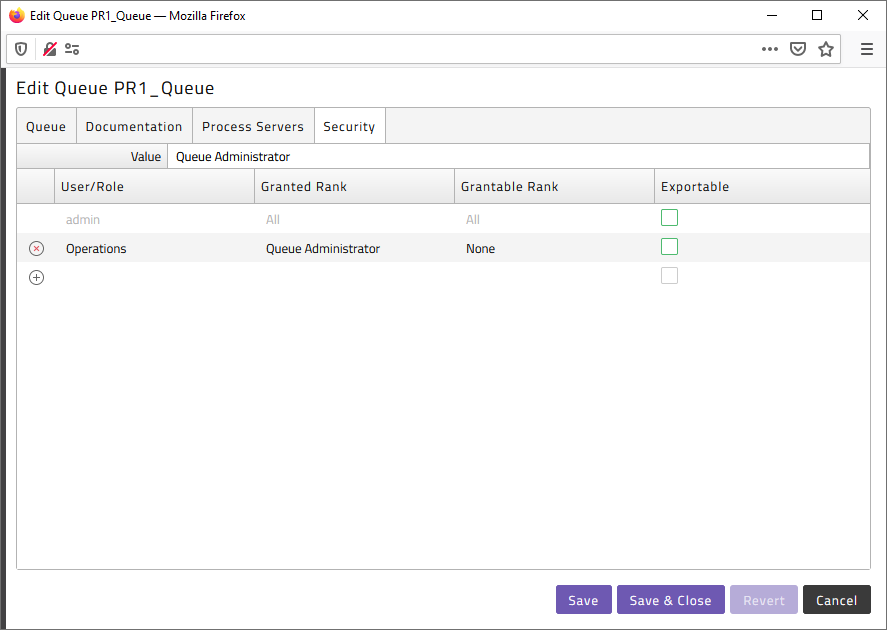
You cannot grant privileges directly, you grant ranks of privileges. For example, if you grant the Edit rank to a custom role, the users that have this role have the View and Edit privileges. This reduces the amount of grants you need to make and avoids human error, as you cannot grant the Edit privilege without the View privilege, which would not make sense. You can of course grant multiple ranks, like Edit and Delete, to your custom roles.
Procedure
To create an object of a particular type:
- Find the object type in the navigation bar.
- Choose the icon to go to the overview screen for that object.
- Choose
New <object_type>from the context-menu.
To edit an object of a particular type:
- Navigate to the overview screen for that object.
- Use the context-menu of the object and choose 'Edit'.
To delete an object of a particular type:
- Navigate to the overview screen for that object.
- Choose the object that is to be deleted in the table.
- Choose Delete from the context-menu.
Advanced Actions
The following table lists the topics that describe frequently used tools and features.